

















Trigger the scanner to read barcodes through the network
Announcer: Danica Time: 2026年05月28日
Share to :


MORE
 578 views
 0 comments
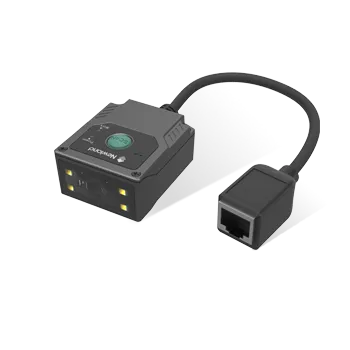
Taking NVF230 as an example:
1 Use network communication (Connect the network cable)-
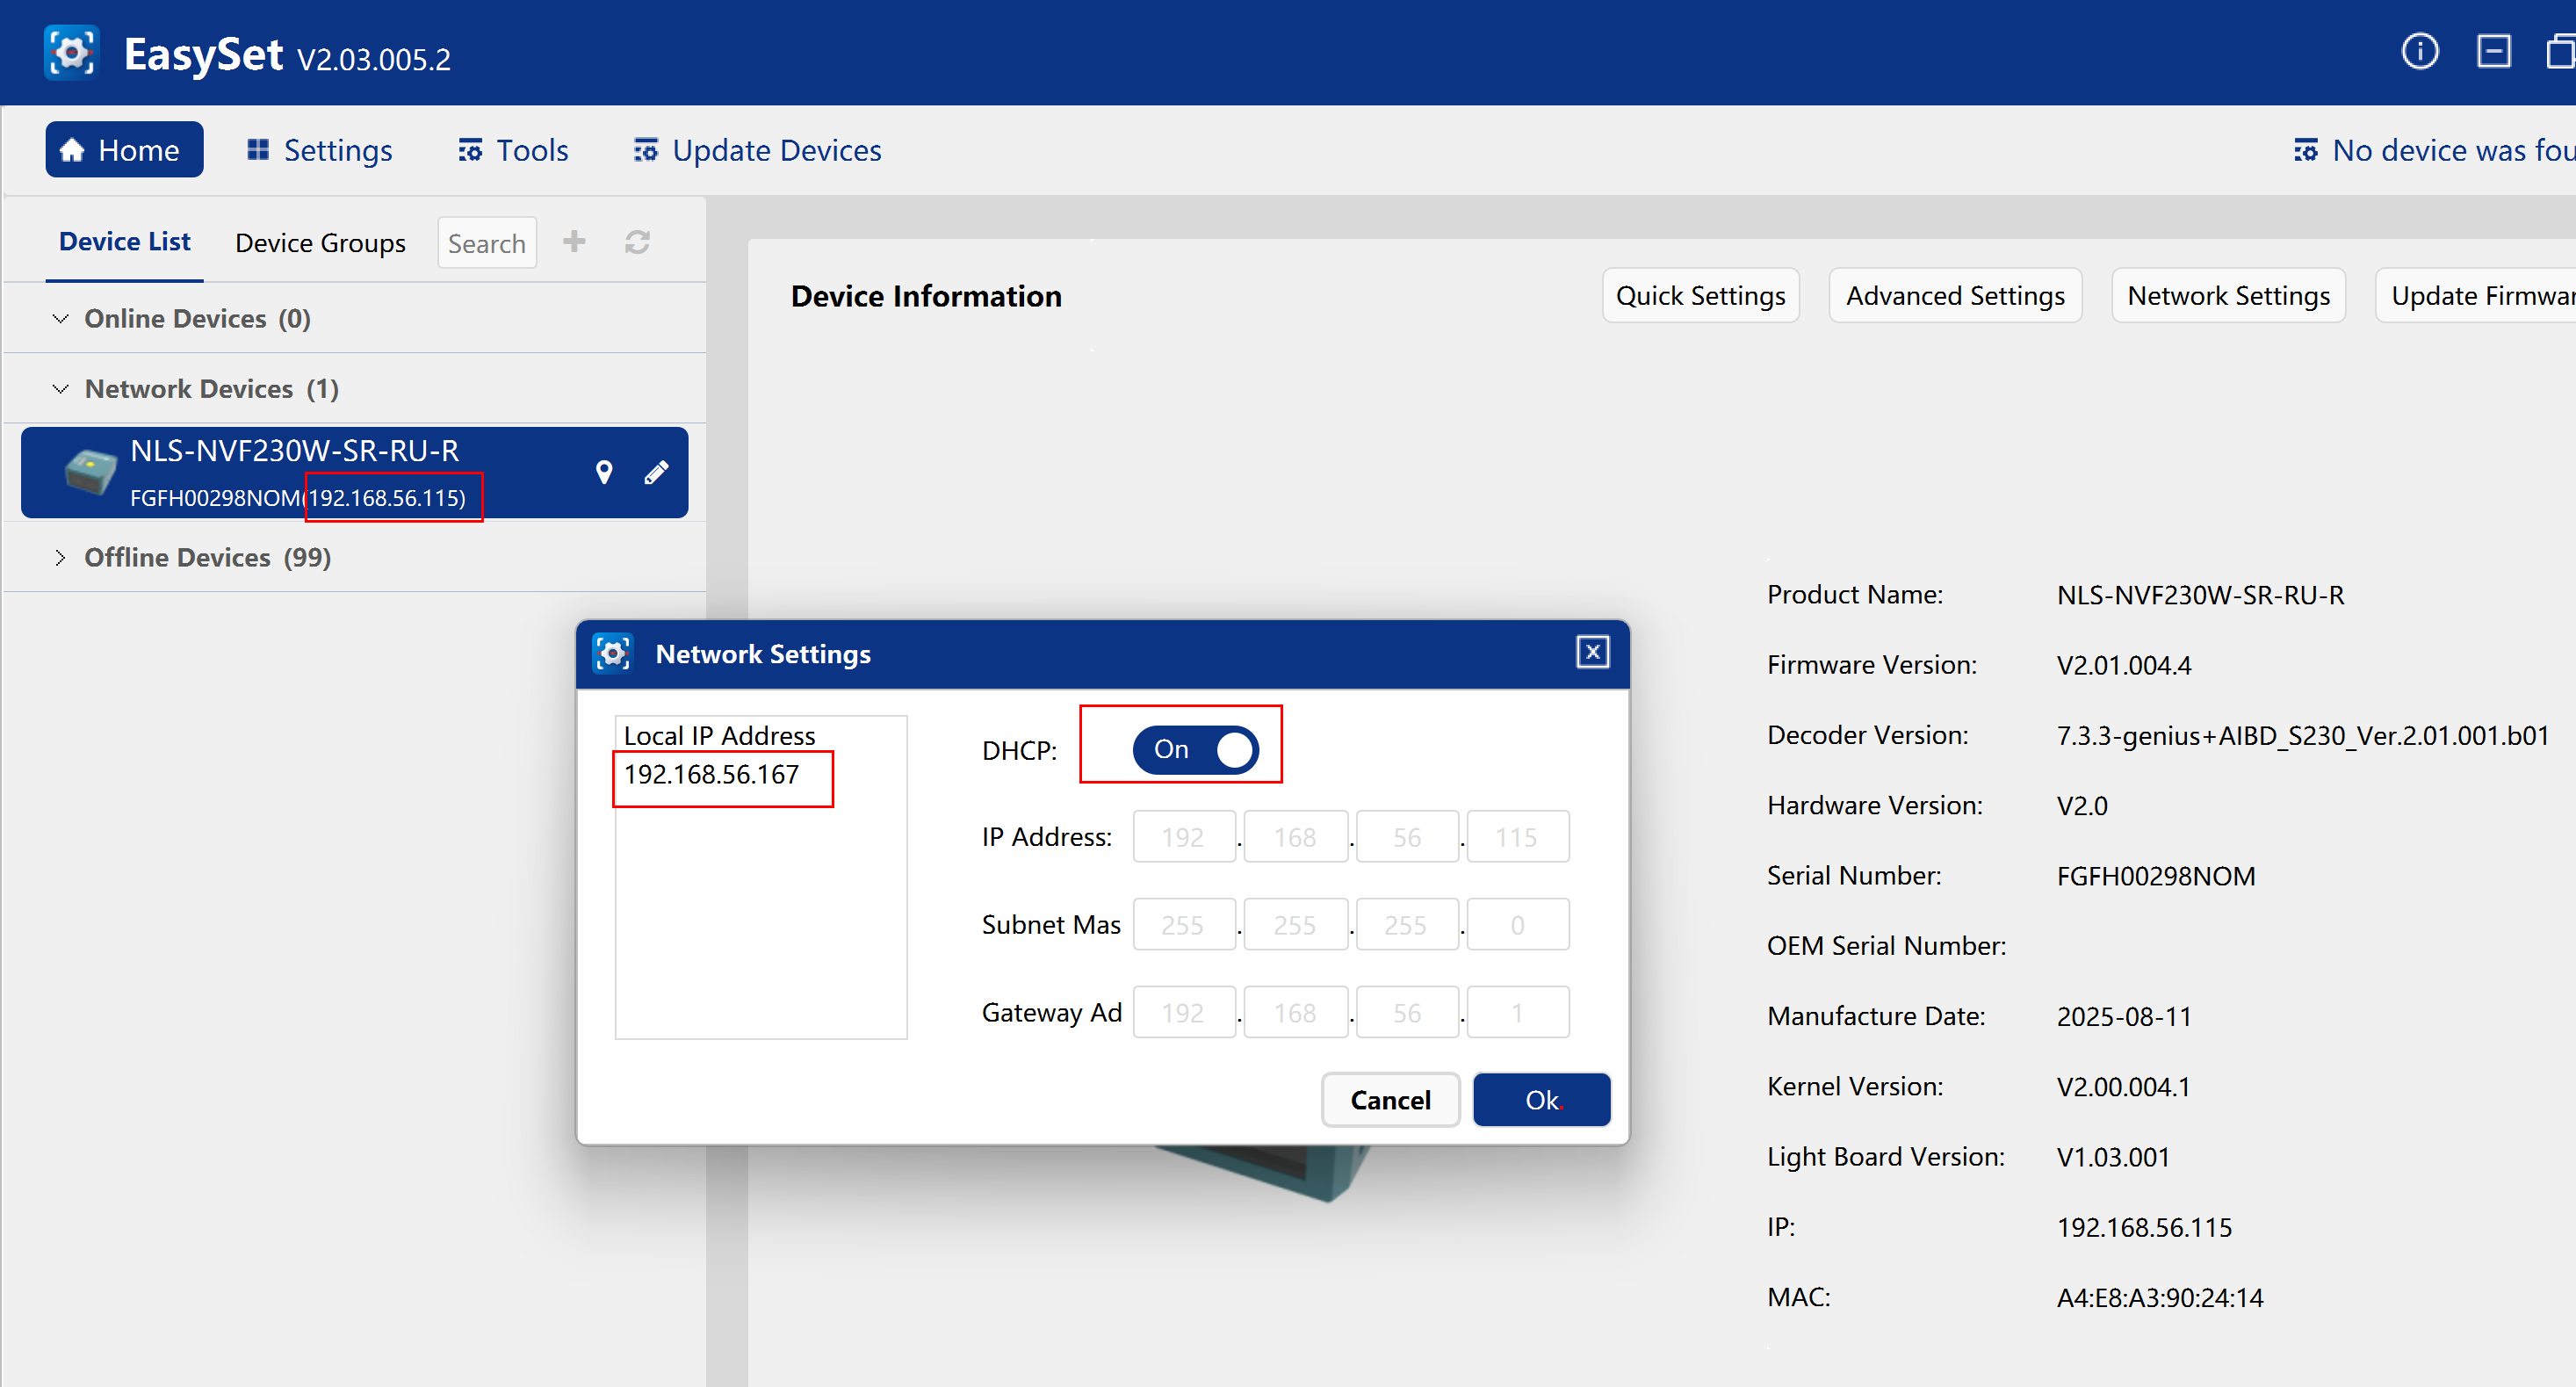
- 1)Select the network device on the left
- 2)Network Settings -> Select “DHCP”
- 3)Remember “Locale IP Address”
-
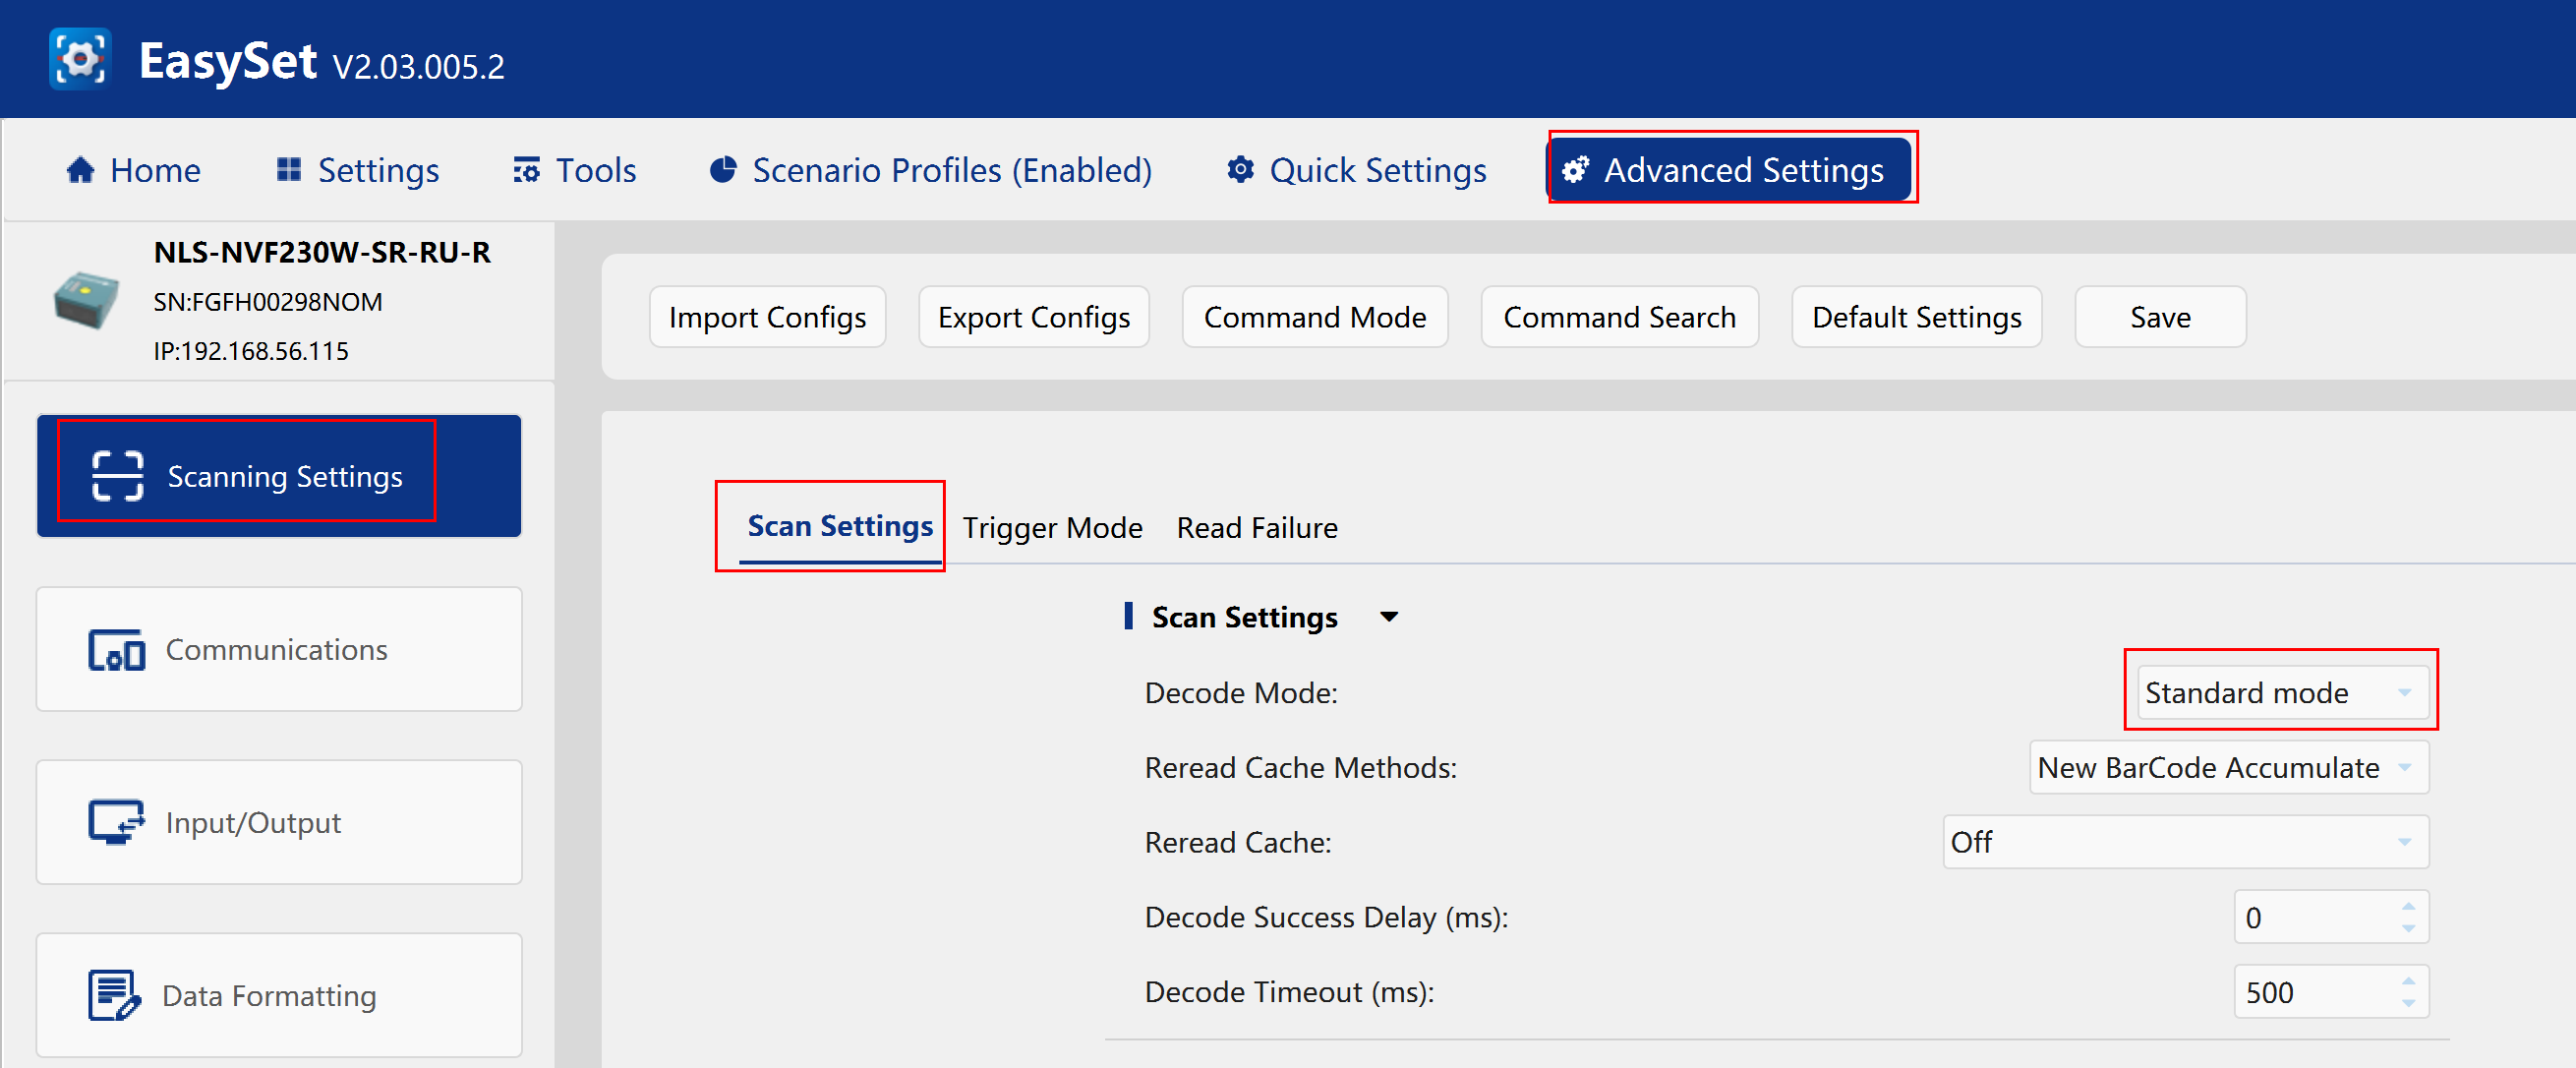
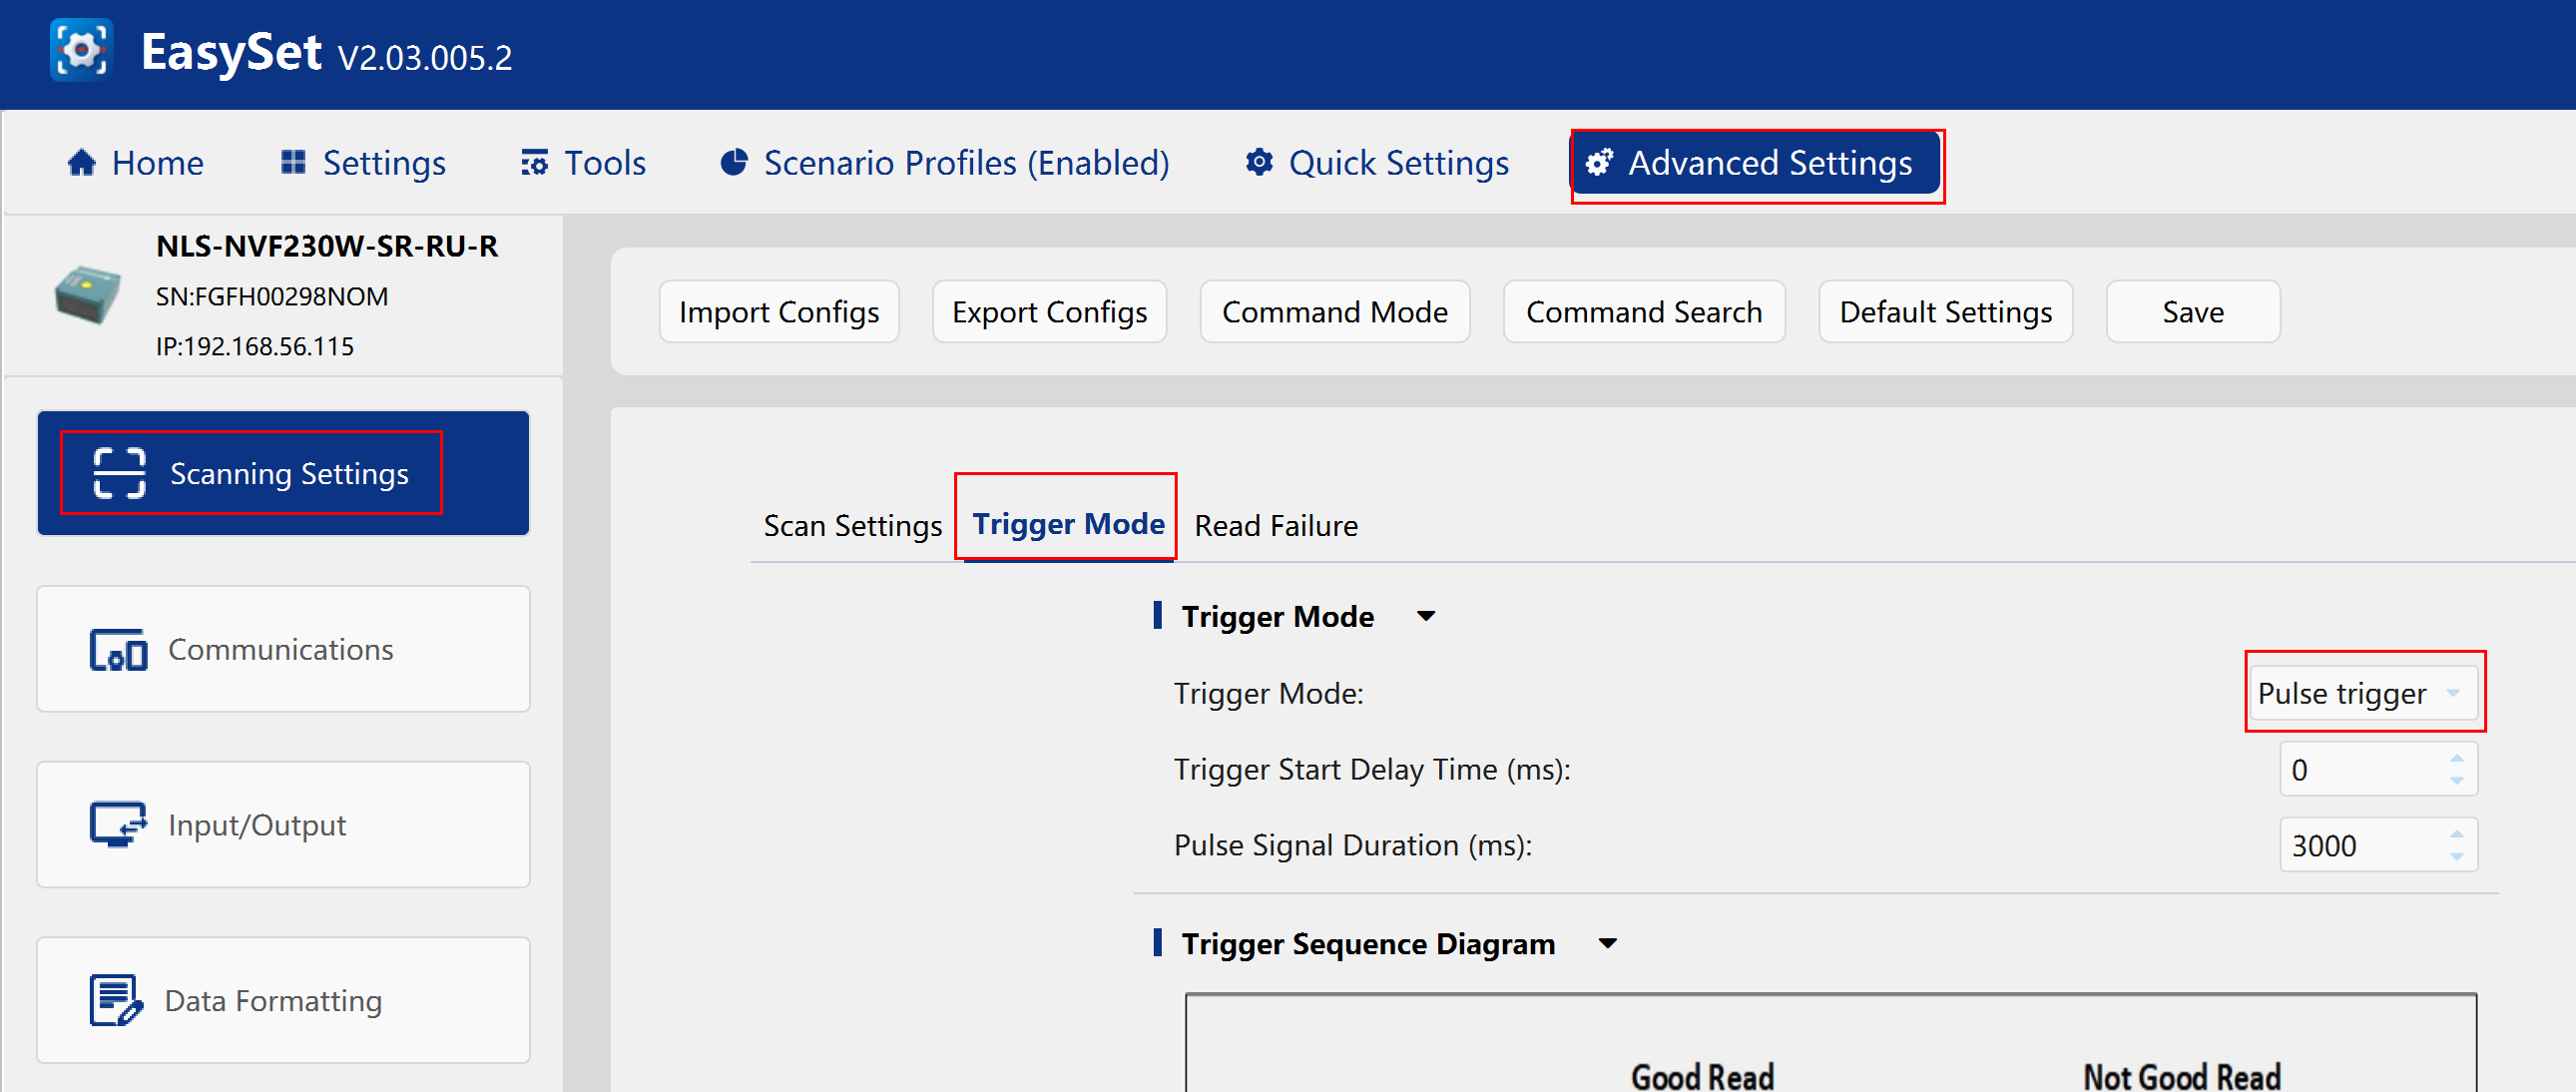
- 1)Advance Setup -> Scanning Settings
- 2)Scan Settings->Decode Mode -> Select” Standard mode”
- 3)Triger mode-> Triger mode Select” Pulse trigger”
-
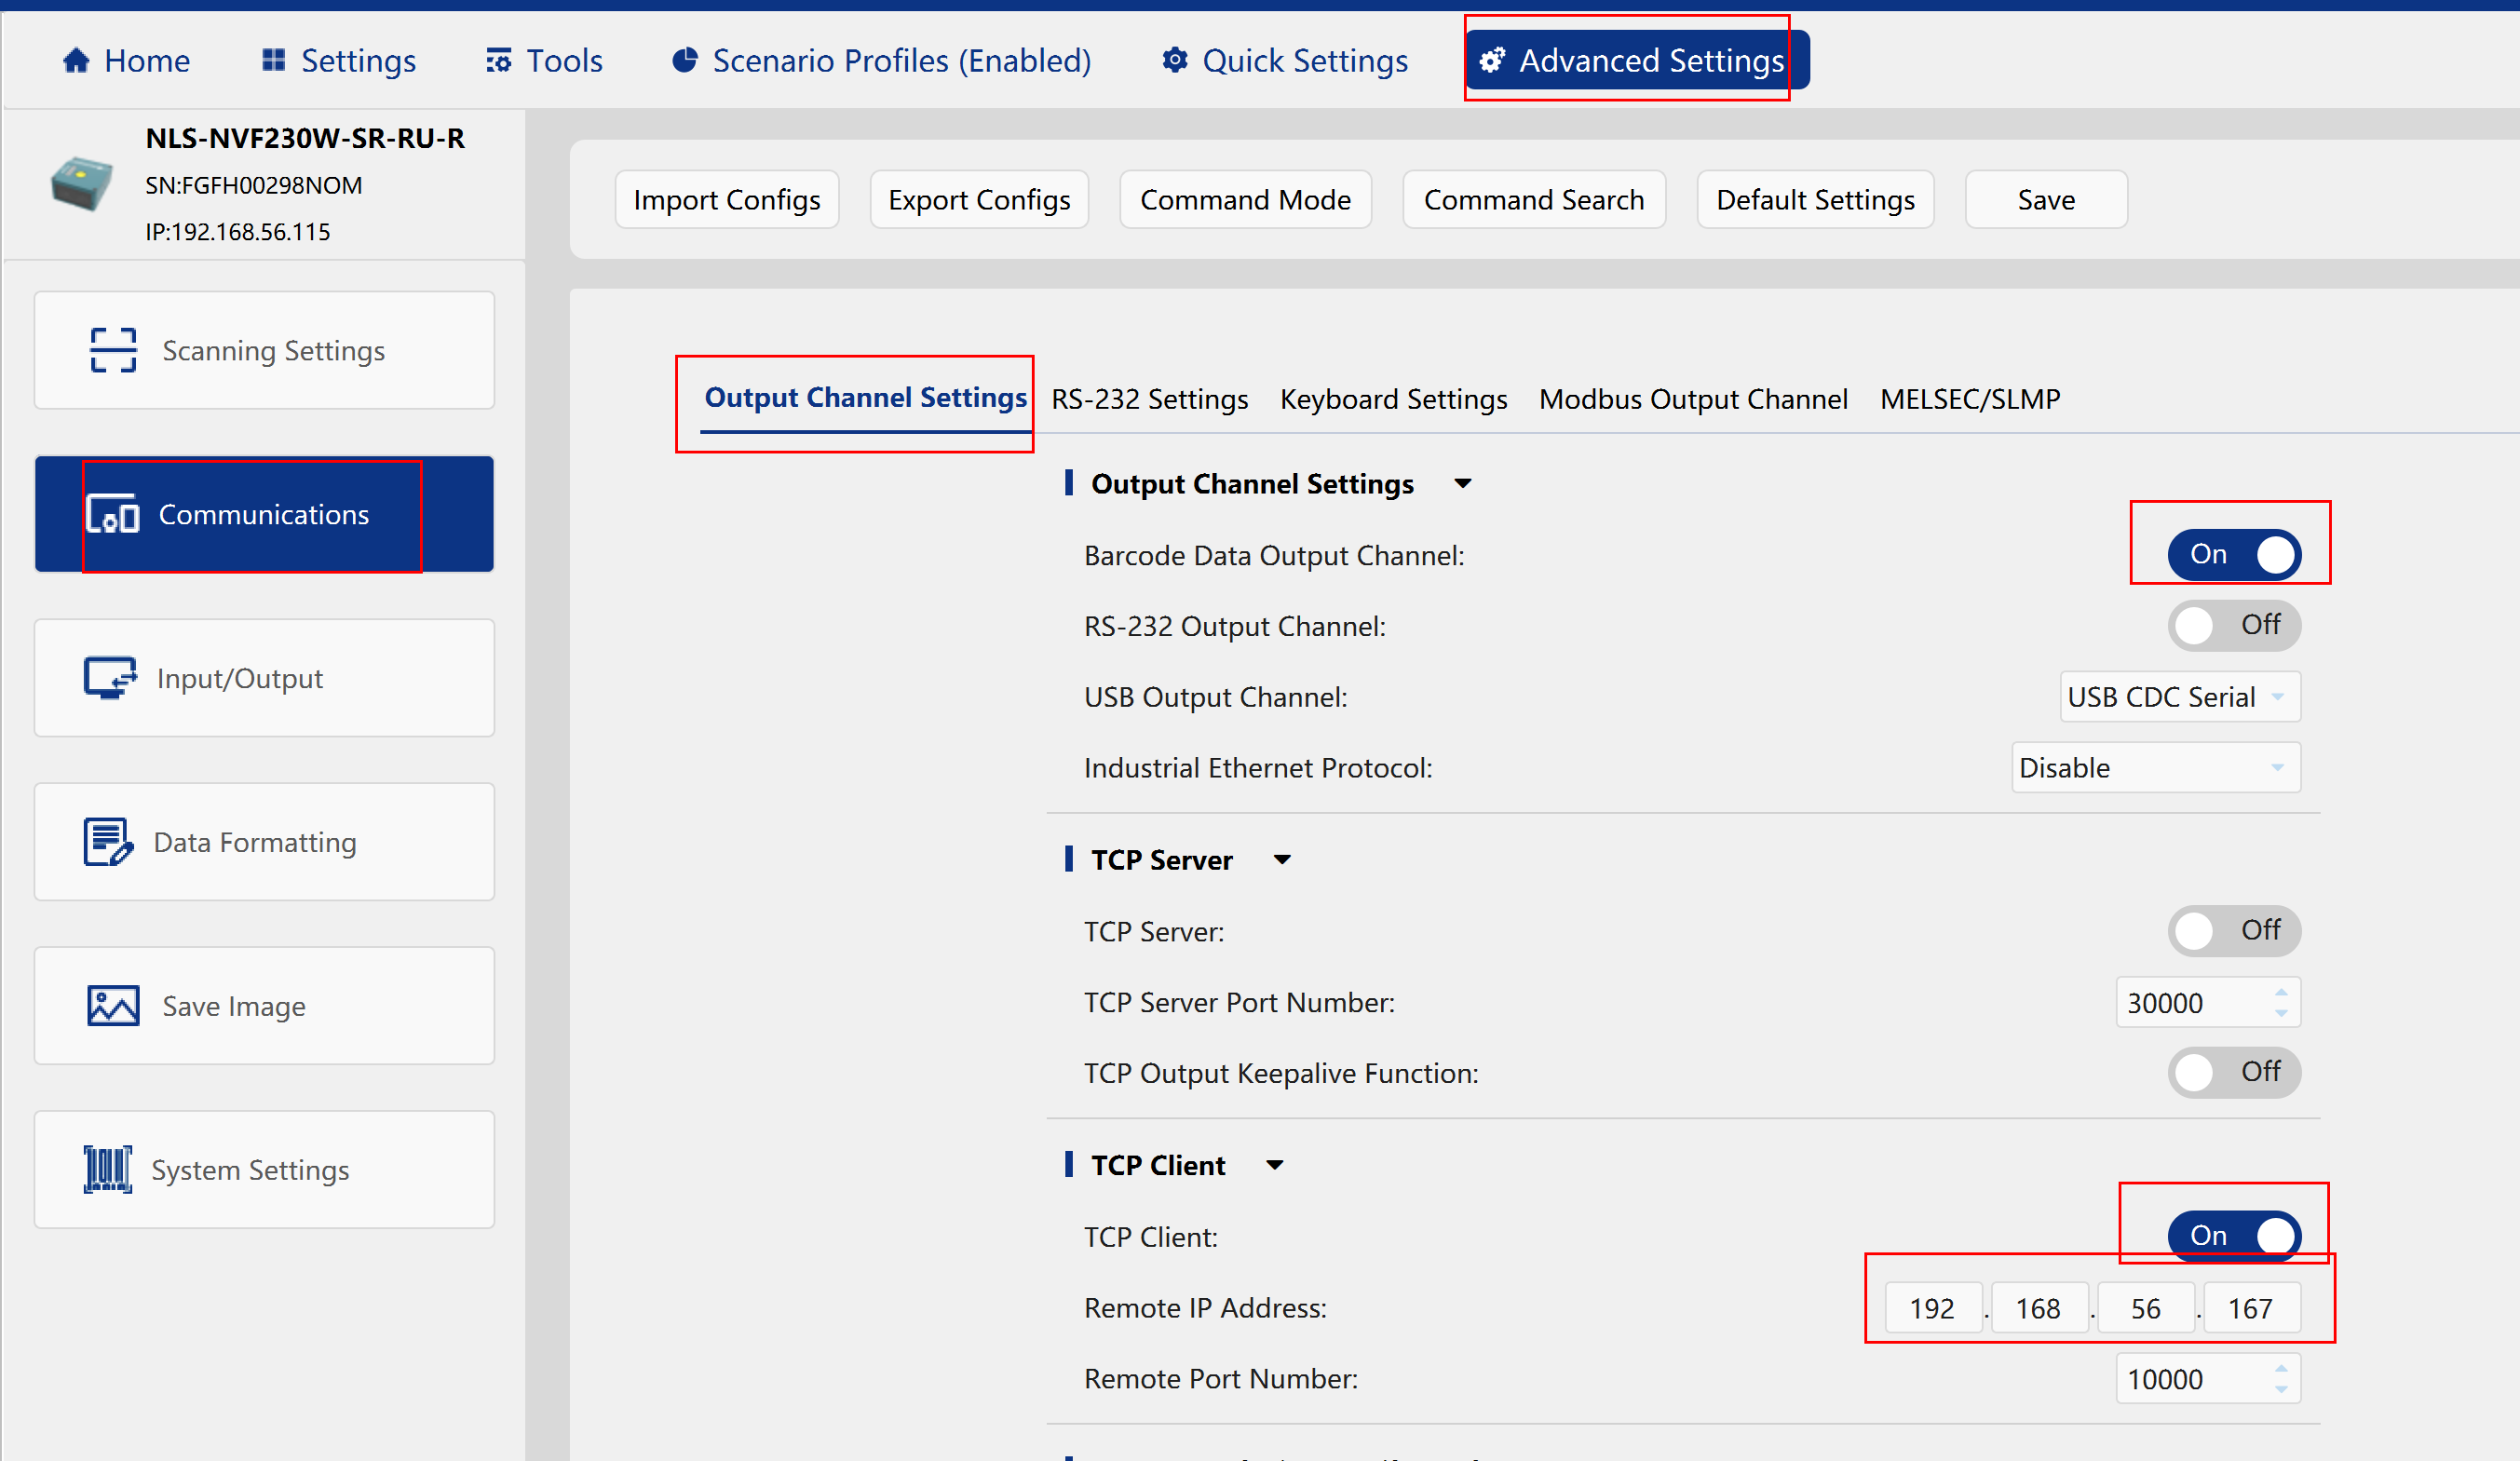
- 1)Advance Setup -> Communications->Output Channel Settings
- 2)Turn on the Barcode Data Output Channel
- 3)Turn on the TCP Client
- 4)Remote IP Address->Enter “Locale IP Address” (e.g. 192.168.56.167)
- 5)Remote Port Number:10000 (default value)
- Default values can be used.
-
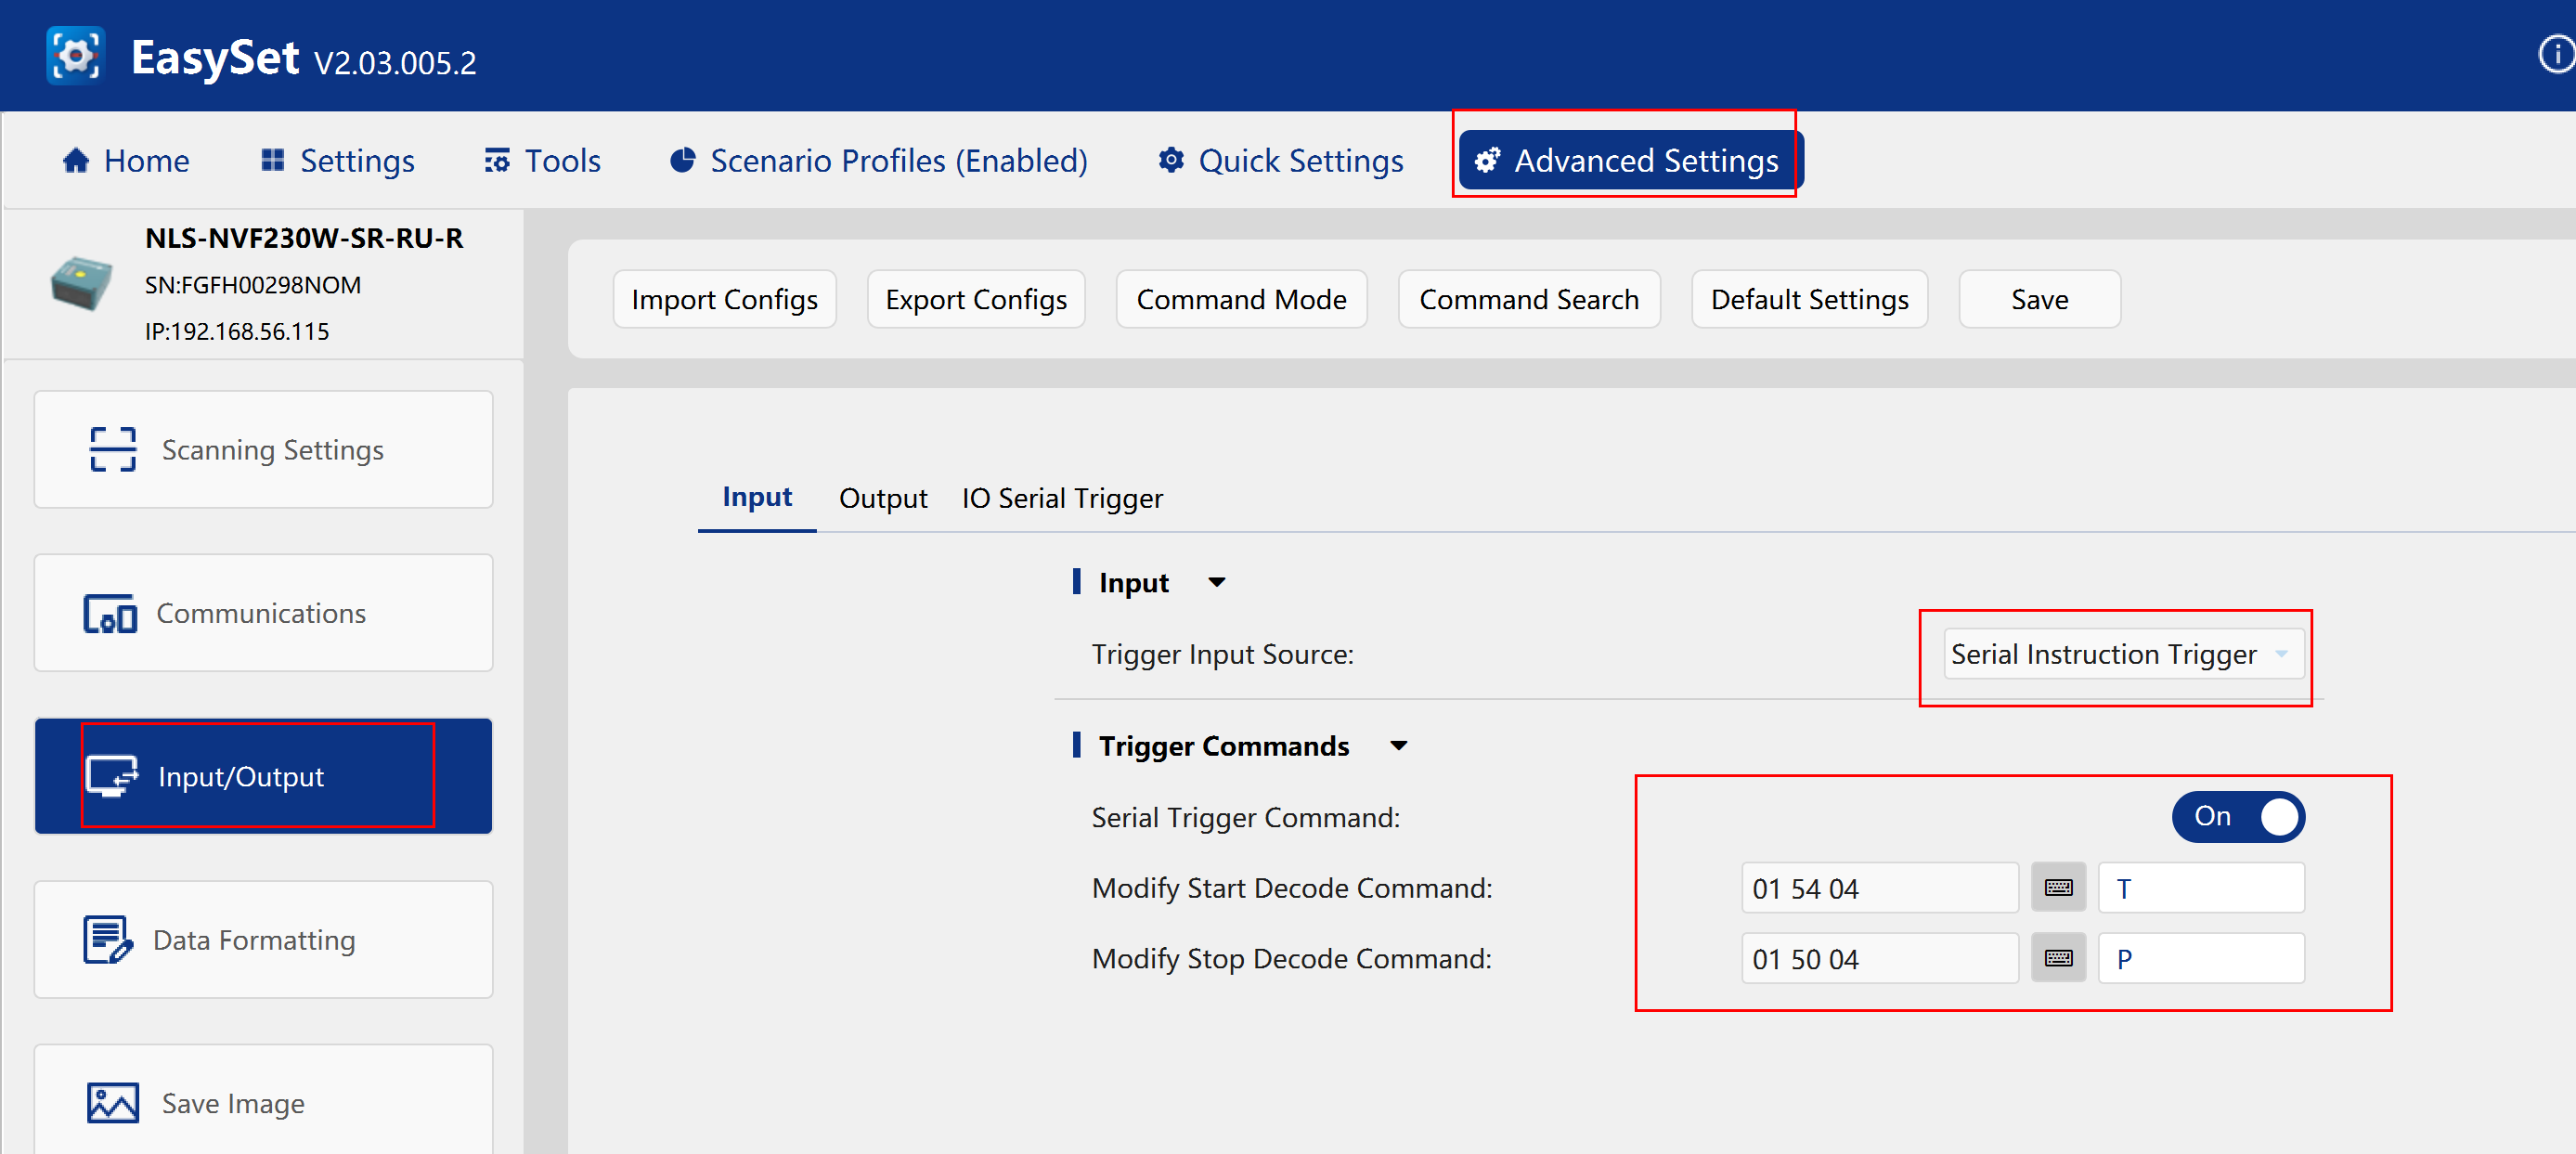
- 1)Advance Setup -> Input/Output->Input
- 2)Triger Input Source-> Select” Serial Instruction Trigger”
- 3)Turn on the Serial Trigger Command
- 4)Modify Start Decode Command (e.g. 0x01 0x54 0x04)
- 5)Modify Stop Decode Command (e.g. 0x01 0x50 0x04)
-
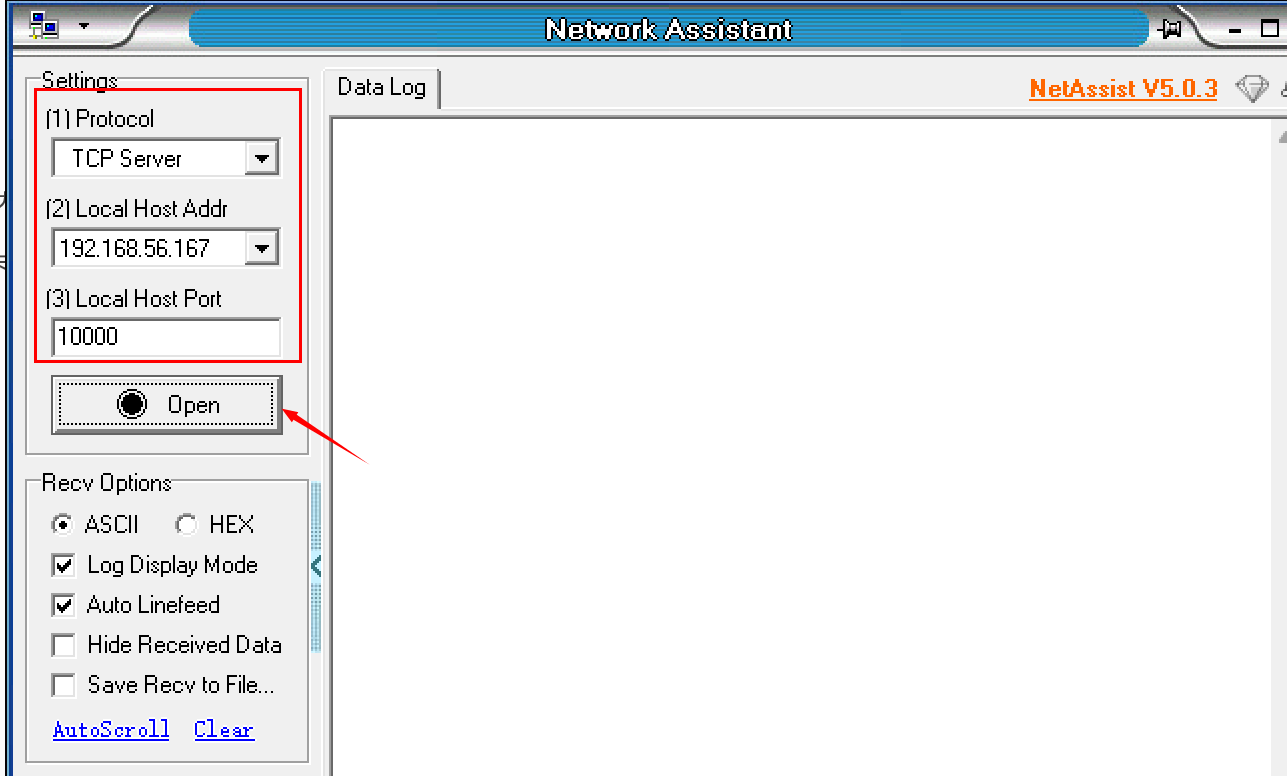
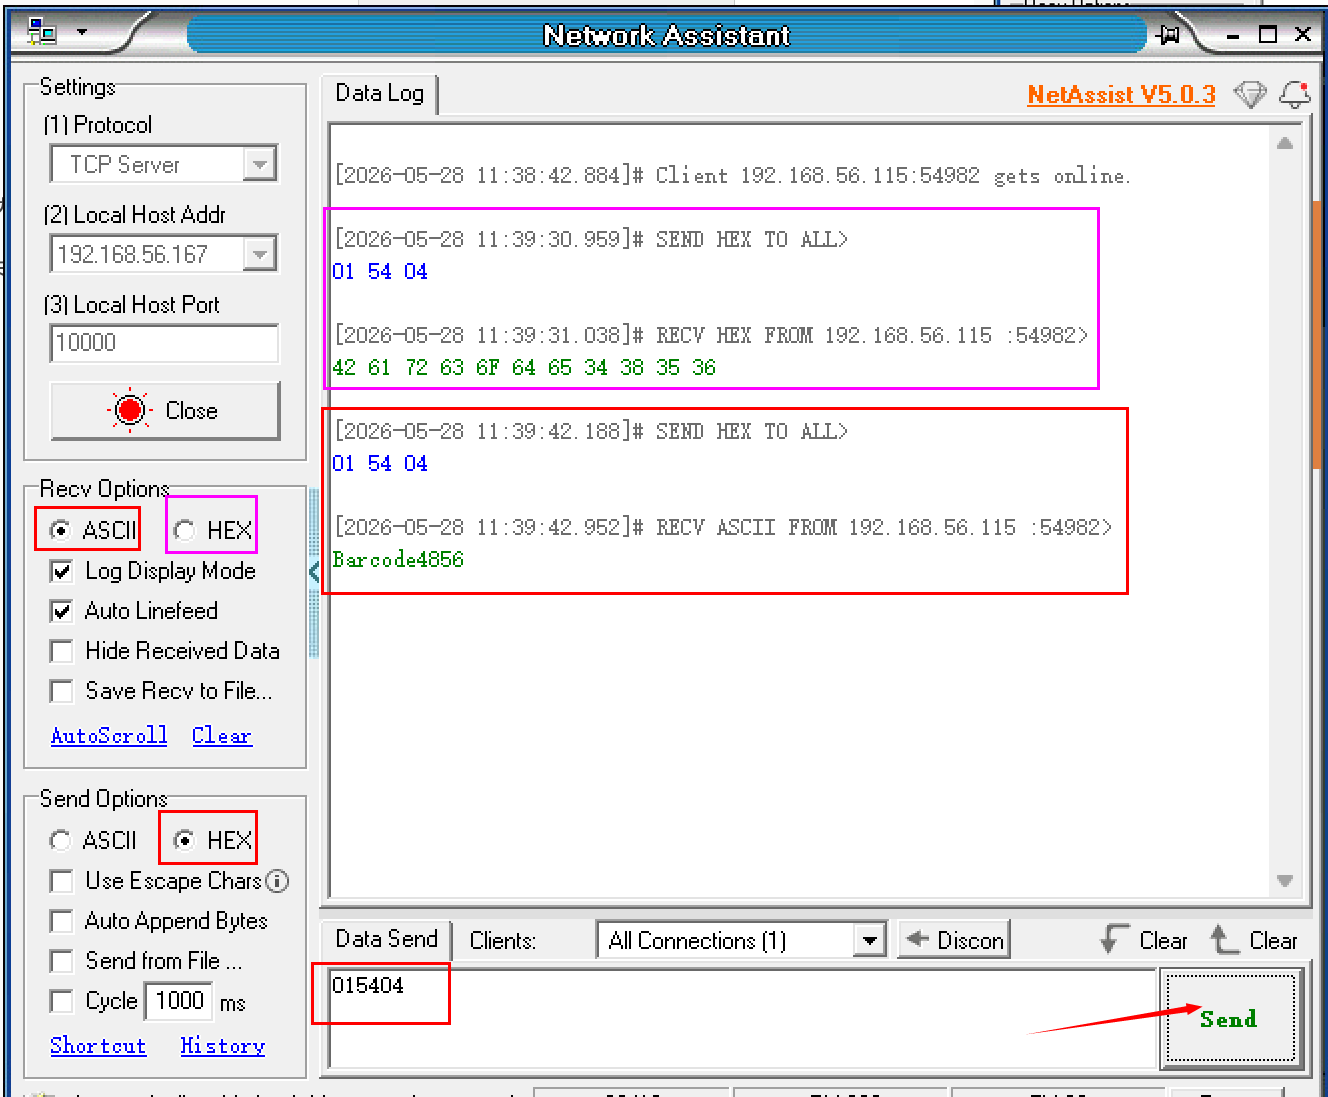
- 1)Open a network tool (e.g. NetAssist)
- 2)Settings-> Protocol->Select” TCP Server”
- 3)Locol Host Addr-> Select the Locale IP Address (e.g. 192.168.56.167)
- 4)Locol Host Port -> same as Remote Port Number (e.g. 10000)
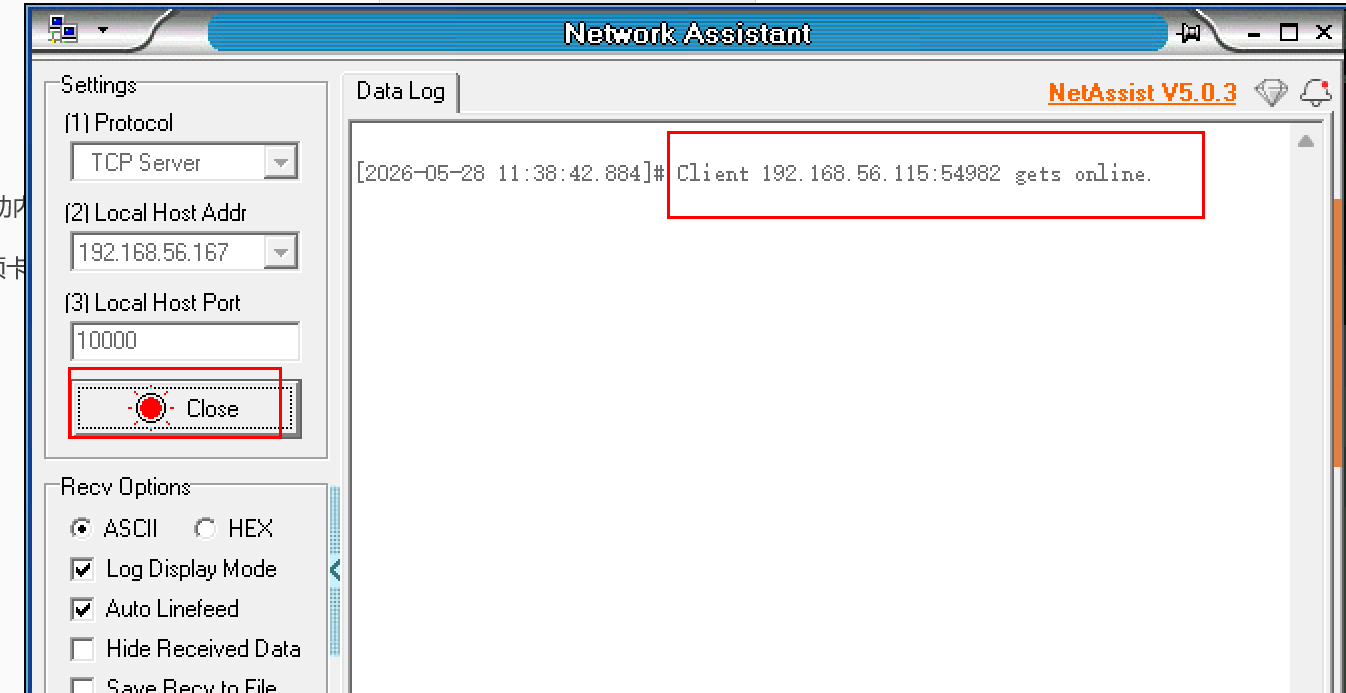
- 5)Click “Open” button
- 6)Send Options-> choose “HEX”
- 7)Input the command in Data Send box
- 8)Click “Send” button
- 9)The barcode data will be displayed in the Data Log box
All comments (0)


